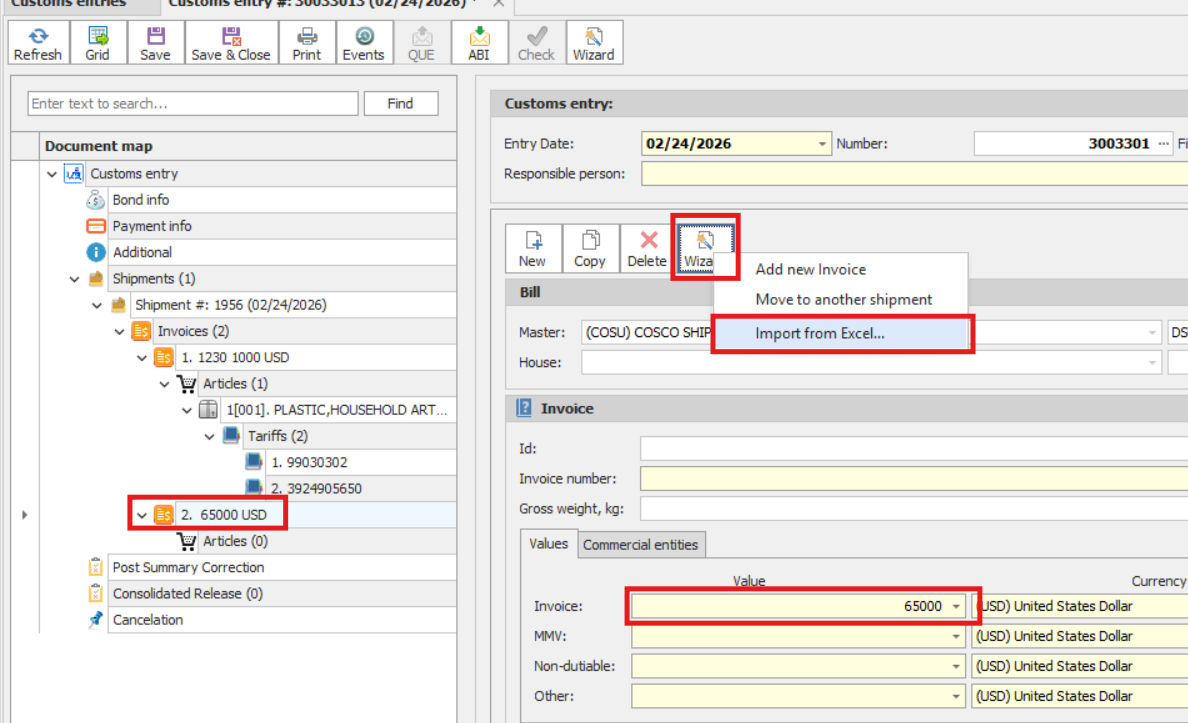
You can import shipment and invoice data directly from an Excel file by following the steps below:
Step 1: Prepare the Entry
1.Create an Entry.
2.Add a Shipment.
3.Create an Invoice.
4.Enter the Total Invoice Value.
Step 2: Start the Import Process
1.Click Wizard → Import from Excel.
2.On the screen that opens, select the Excel file you want to import.
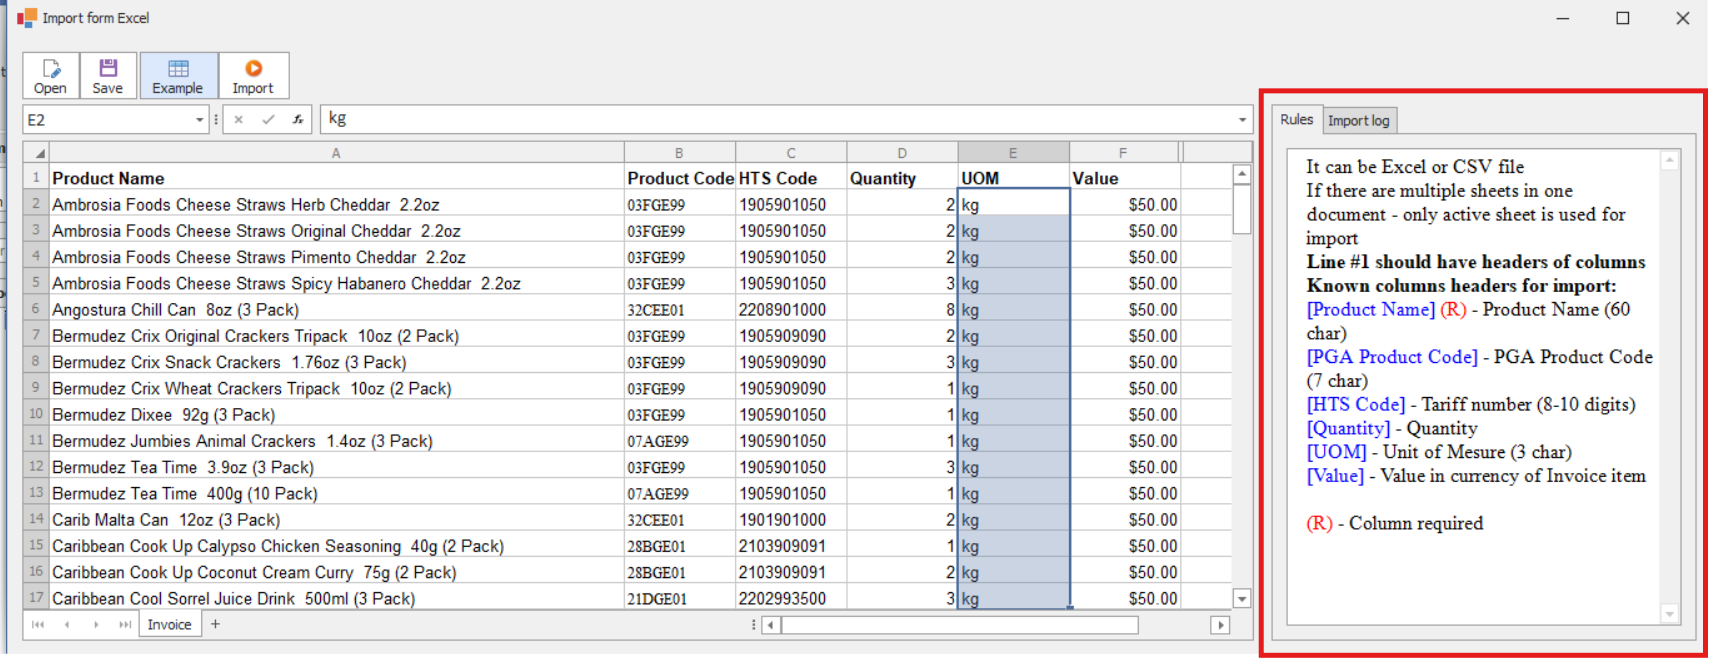
Step 3: Edit and Prepare the Excel Data
After selecting the file, an Excel-like editing screen will open.
On this screen, you can:
•Add or remove columns
•Copy and paste columns
•Modify data directly
On the right side of the screen, you will see a list of fields that can be imported.
⚠️ Important:
The column names in your Excel sheet must exactly match the field names shown on the right side of the screen. The system is case-sensitive and rule-based.
Once your sheet matches the system requirements (rules), click Import.
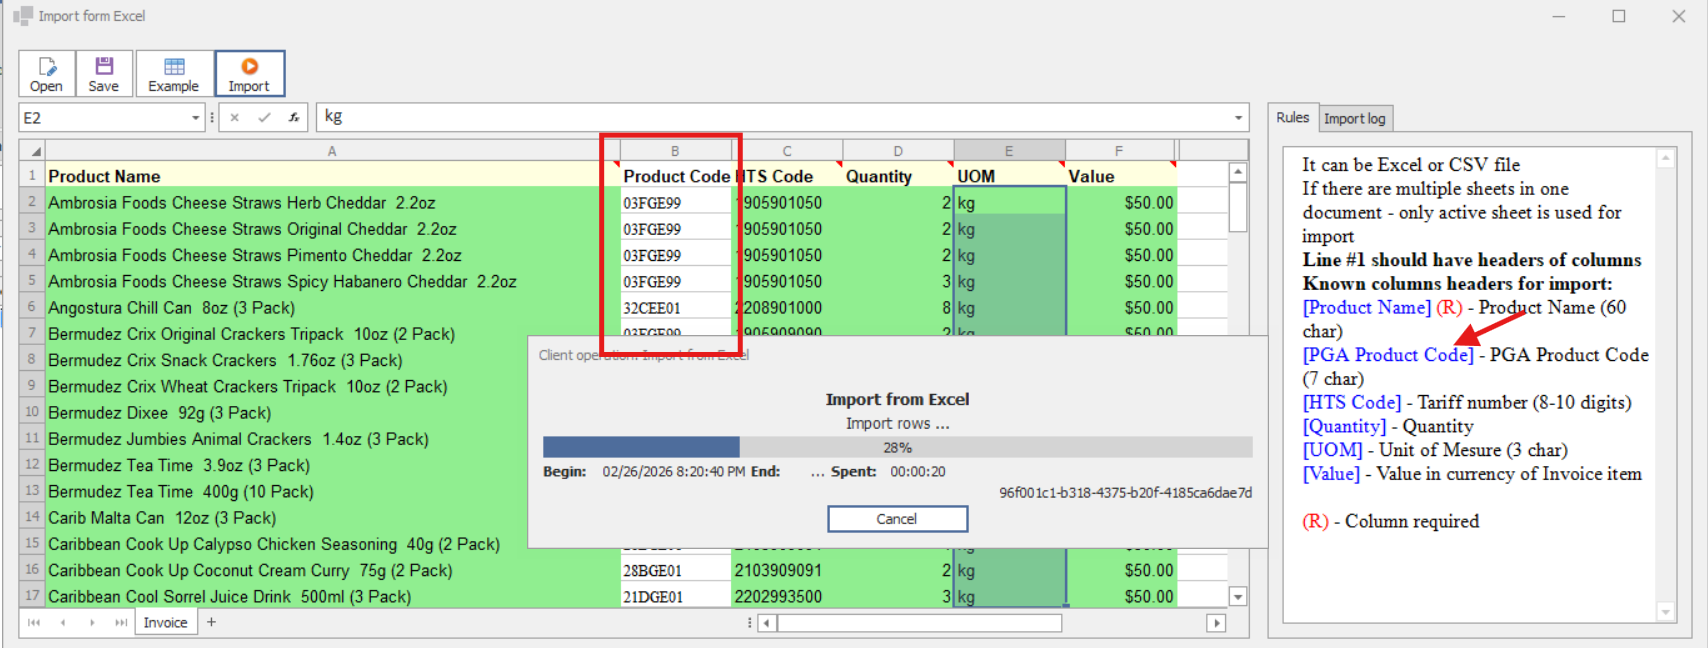
Step 4: Data Validation
After clicking Import, the system will validate the Excel data.
•Columns that match the required field names will be validated.
•Columns that do not match will not be imported.
Example:
If the Product Code column appears white and is not validated, it means the column name does not match the required system field name.
What to Do in This Case:
1.Stop the import.
2.Correct the column name so it matches the system requirement exactly.
3.Restart the import process.
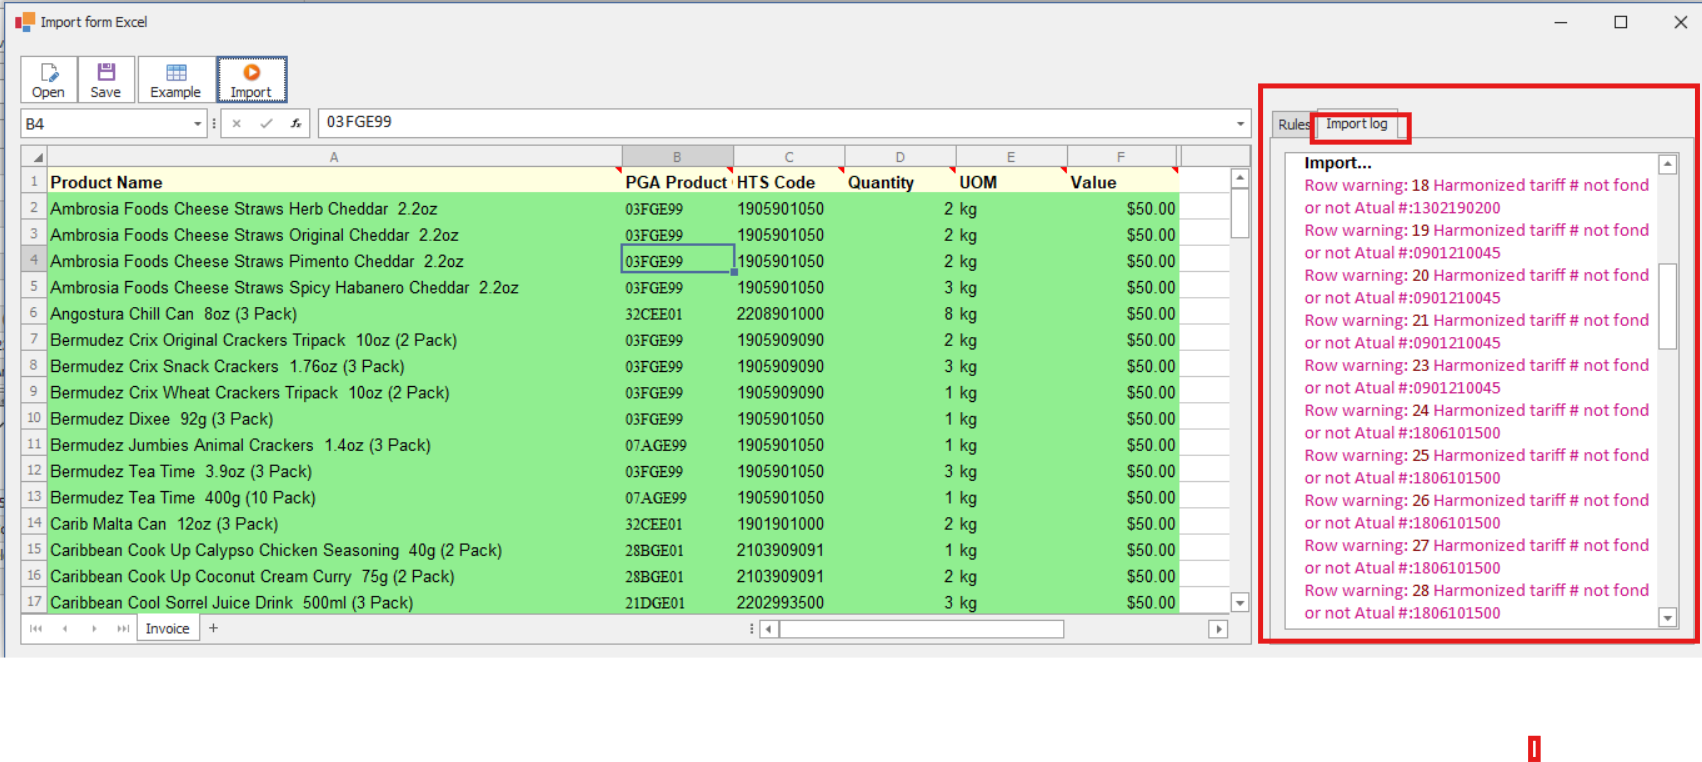
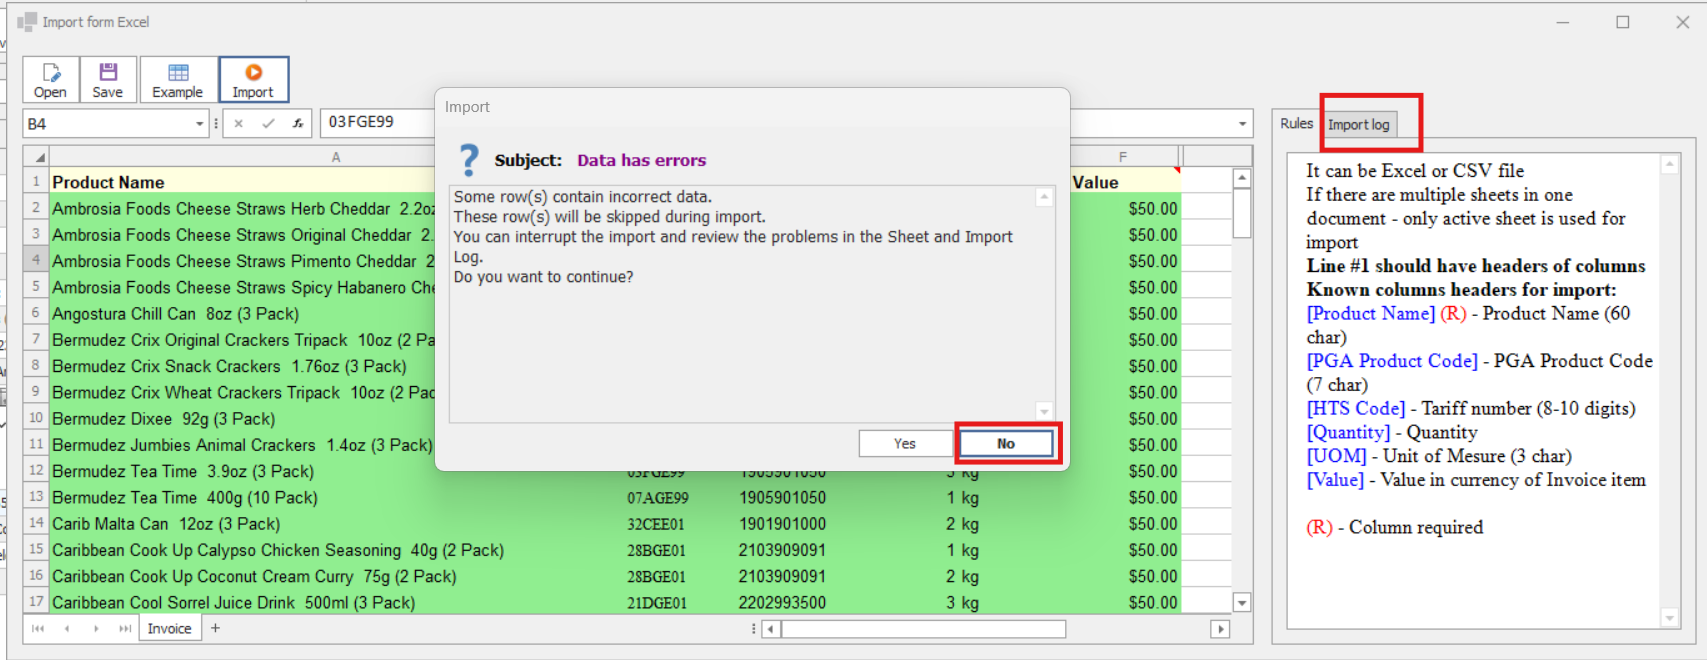
Step 5: Handling Validation Errors
If you receive an error screen during import:
1.Click Cancel Import.
2.Go to Import Log to review the validation error details.
3.Identify the reason for each error.
4.Fix the errors directly in the Excel sheet.
5.Start the import again.
Step 6: Tariff Validation
•Tariff validity is checked during the import process.
•After the import is completed, you may receive a server validation error.
If this happens:
1.Go to the Import Log.
2.Review which tariffs are not currently in effect.
3.Update or correct the tariff information as required.
4.Re-import the file if necessary.